One time, I needed to print something quickly, but my Wi-Fi wasn’t working. So, I used an Ethernet cable to connect my printer. It was easy! Let me show you step by step how to do it.
how to connect printer via ethernet cable without router ( short answer )
To connect a printer with an Ethernet cable without a router, plug the cable into your printer and computer. Set matching IP addresses, install the printer driver, and start printing. It’s simple and works without Wi-Fi!
In this article we will discuss how to connect printer via ethernet cable without router.
Understanding How To Connect Printer Via Ethernet Cable Without Router
Connecting a printer without a router using an Ethernet cable is simple. First, plug the Ethernet cable into your printer and computer. Then, set matching IP addresses for both devices. Install the printer driver on your computer, and you’re ready to print. This method is helpful when you don’t have Wi-Fi or a router available.
Why Use An Ethernet Cable For Printing?
Using an Ethernet cable for printing is reliable and fast. It creates a direct connection between your printer and computer, so you don’t need Wi-Fi or a router. This setup is perfect for quick and stable printing, especially when working in areas with poor internet or no wireless connection. Plus, it’s easy to set up!
Advantages Of Direct Ethernet Connections
- Stable Connection: Provides a reliable, uninterrupted link between your printer and computer.
- No Need for Wi-Fi: Works without needing a wireless network or router.
- Faster Printing: Offers quicker data transfer for faster print jobs.
- Simple Setup: Easy to set up with no complicated configurations required.
- More Secure: Less risk of interference or hacking compared to Wi-Fi connections.
What You Need To Get Started?
Before you start, gather an Ethernet cable, a printer with an Ethernet port, and a computer. Ensure both the printer and computer are powered on. You’ll also need the printer driver installed or ready to install.
Step 1: Check Your Printer’s Ethernet Port
Make sure your printer has an Ethernet port, usually located at the back. Look for a small rectangular port where the Ethernet cable plugs in. If your printer doesn’t have one, this connection method won’t work.
Step 2: Connect The Ethernet Cable To The Printer
Take an Ethernet cable and plug one end into your printer’s Ethernet port. Ensure it clicks into place securely. This cable will act as a direct communication line between your printer and computer.
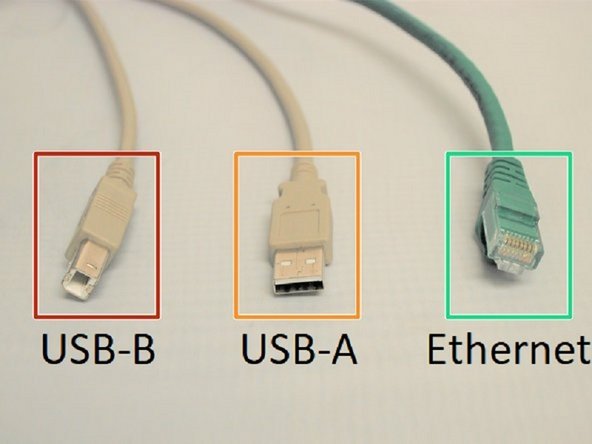
Step 3: Plug The Ethernet Cable Into Your Computer
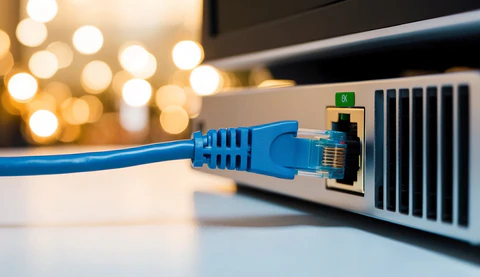
Connect the other end of the Ethernet cable to your computer’s Ethernet port. If your computer doesn’t have one, you might need a USB-to-Ethernet adapter. The cable directly links your devices for fast printing.
Step 4: Manually Set The Printer’s Ip Address
Access your printer’s menu to set a static IP address. Ensure it’s in the same range as your computer’s network settings. For example, if your computer uses 192.168.1.10, set the printer to 192.168.1.20.
Step 5: Configure Your Computer’s Network Settings
Go to your computer’s network settings and assign a static IP address that matches the printer’s range. This step ensures the printer and computer can communicate directly without needing a router.
Step 6: Install The Printer Driver On Your Computer
Install the correct driver for your printer. You can usually download it from the manufacturer’s website. Follow the installation steps, and when prompted, select the connected Ethernet option.
Step 7: Test The Printer Connection
Print a test page to confirm everything is working. If the printer responds and the page prints correctly, your setup is complete. If not, double-check the connections and IP settings for any mistakes.
Troubleshooting Common Issues And Their Solutions
When connecting your printer, you may encounter a few common issues. Below are the problems and their fixes:
Issues:
- Printer Not Detected by Computer
- IP Address Conflict
- Driver Installation Failure
- Printer Not Printing
Explore the solutions to resolve these problems:
Solutions:
- Printer Not Detected by Computer: Check if the Ethernet cable is securely connected. Restart both the printer and computer. Replace the cable if it’s damaged.
- IP Address Conflict: Ensure the printer and computer have unique IP addresses in the same range (e.g., 192.168.1.10 and 192.168.1.20). Adjust settings manually if needed.
- Driver Installation Failure: Download the latest driver from the printer’s official website. Make sure it matches your computer’s operating system. Restart the installation process.
- Printer Not Printing: Check the printer queue for errors. Restart the printer and try again. Ensure paper and ink levels are sufficient, and no paper is jammed.
With these solutions, your printer should work smoothly.
Read Also: Canon Printer Filter Failed Chromebook – Solve Issues!
When To Use This Setup Without A Router
This setup is ideal when you don’t have a router or Wi-Fi access, such as in remote areas, temporary workspaces, or offices with limited internet. It’s also useful when you want a faster, more secure connection for direct printing. The direct Ethernet connection ensures reliable performance without the need for wireless networks.
How To Connect Printers Via Ethernet Cable Without Router Windows 7?
To connect a printer via Ethernet cable without a router on Windows 7, plug the Ethernet cable into both the printer and computer. Manually assign IP addresses to both devices. Install the printer driver and select the printer using the network option. Finally, test the connection by printing a test page.
How To Connect Printers Via Ethernet Cable Without Router Windows 10?
On Windows 10, connect the printer and computer using an Ethernet cable. Set static IP addresses for both devices within the same network range. Install the printer driver, and during setup, choose the network connection. After installation, print a test page to confirm the connection is successful.
How To Connect A Printer With Ethernet Cable?
To connect a printer with an Ethernet cable, plug one end into the printer’s Ethernet port and the other into your computer’s Ethernet port. Set matching IP addresses for both devices. Install the printer driver on your computer and select the correct connection type. Test by printing a document.
How To Connect A Printer Via Ethernet Cable Windows 10?
To connect a printer via Ethernet cable on Windows 10, plug the cable into both the printer and computer. Assign static IP addresses to both devices. Download and install the appropriate printer driver. Select the printer using the network connection during installation, then test the connection by printing.
How To Connect A Printer Via Laptop Ethernet Cable Without Router?
To connect a printer to your laptop via Ethernet cable without a router, plug one end of the Ethernet cable into the printer and the other into the laptop’s Ethernet port. Set static IP addresses for both devices, install the printer driver, and select the printer from the network list. Finally, test the connection by printing a document.
Read Also: Gcode Not Showing Up On Printer – Unlock Ultimate Guide!
How To Connect A Printer Via Ethernet Cable Without A Mac Router?
On a Mac, connect your printer and computer with an Ethernet cable. Manually set the printer’s IP address and make sure it matches your computer’s network. Install the necessary printer drivers. Choose the printer from the network list, and print a test page to confirm the connection.
How To Connect An Hp Printer With An Ethernet Cable?

To connect an HP printer with an Ethernet cable, plug one end into the printer and the other into the computer. Set static IP addresses for both. Install the HP printer driver on your computer and select the Ethernet option during setup. Test the connection by printing a document.
What Type Of Ethernet Cable Do I Need For This Setup?
You can use the following types of Ethernet cables for this setup:
- Cat5: Basic option, supports speeds up to 100 Mbps.
- Cat5e: Enhanced version of Cat5, supports speeds up to 1 Gbps.
- Cat6: Faster and better for larger data transfers, supports speeds up to 10 Gbps.
- Cat6a: Advanced version of Cat6, offers better performance for high-speed connections.
Read Also: How Long Can A Ink Tank Printer Sit Unused – Ultimate Guide Care!
Frequently Asked Questions
1. How Do I Connect My Printer Directly To My Computer?
To connect your printer directly to your computer, use an Ethernet cable or USB cable. For Ethernet, set matching IP addresses on both devices. For USB, simply plug the printer into the computer. Install the necessary drivers and select the printer when printing. Test the connection by printing a document.
2. Do I Need A Static Ip Address For This Setup?
Yes, you need to assign static IP addresses to your printer and computer to ensure they can communicate properly on the same network range.
3. Do Usb To Ethernet Adapters Work?
Yes, USB to Ethernet adapters work well. They allow devices without an Ethernet port to connect to a wired network for stable and fast internet or printer connections.
4. Are Usb To Ethernet Adapters Worth It?
USB to Ethernet adapters are worth it if you need a reliable wired connection for your device. They are affordable, easy to use, and great for improving network speed and stability.
5. Is Using A Usb Ethernet Adapter Just As Good As An Ethernet Port?
A USB Ethernet adapter works almost as well as a built-in Ethernet port. The performance depends on the adapter’s quality and your USB version, but most provide excellent wired connection speeds.
6. Is This Setup Faster Than Wi-Fi Printing?
Yes, a direct Ethernet connection often provides faster and more reliable printing compared to Wi-Fi, especially for large documents.
7. Can This Setup Work On A Mac?
Absolutely! On a Mac, connect the printer via Ethernet, set matching IP addresses, install the driver, and select the printer from the network list.
8. What Should I Do If The Printer Is Not Detected?
Check the cable connections, restart the devices, and ensure the IP addresses are set correctly. Reinstall the driver if necessary.
9. Is This Method Secure?
Yes, a direct Ethernet connection is more secure than Wi-Fi, as it reduces the risk of interference or unauthorized access to your printer.
10. Can I Use This Method For All Printers?
This method works for most printers with an Ethernet port. Check your printer’s specifications to ensure it supports direct Ethernet connections.
Conclusion
In conclusion, connecting a printer via Ethernet cable without a router is a simple and effective solution for direct printing. By following the steps to set static IP addresses and installing the necessary drivers, you can enjoy fast and reliable printing. This method is ideal when Wi-Fi is unavailable or unstable. With the right setup, you’ll have a seamless printing experience.
Read More:
- Klipper Printer Is Not Ready – Fix Printer Now!
- Heater Heater_bed Not Heating At Expected Rate – Fix Heating!
- Endstop Z Still Triggered After Retract – Fixed 100% In 2024!
- Aquarium Safe 3d Printer Filament – Create With 3d!
- Why Does My 3d Printer Stop Printing Halfway Through – Upgrade Software!
- What Is The Purpose Of A 3d Printer – Innovate Faster!